# Desktop App (VNC)

The Desktop app on Open OnDemand is a replacement for the older VNC Java client. This app allows you to launch a Desktop GUI on Oscar.

{% hint style="info" %}
Advanced users looking for more resources can try the [Desktop (Advanced) app](#desktop-advanced).
{% endhint %}

{% hint style="danger" %}
Do not load any `anaconda` module in your .modules or .bashrc file. These modules prevent Desktop sessions from starting correctly. You may load them inside the Desktop session.
{% endhint %}

## Launching Desktop App (VNC)

### 0. Launch Open OnDemand

Click [here](https://ood.ccv.brown.edu) to launch Open OnDemand (OOD) and log in with you Brown Credentials.

### 1. Select the **`Desktop`** option in **`Interactive Apps`** dropdown list:

<figure><img src="https://4272811953-files.gitbook.io/~/files/v0/b/gitbook-x-prod.appspot.com/o/spaces%2F-LcWJ6pKCQH6l3rl9IQa%2Fuploads%2FhK67JyGtHzebcAwq3Zw6%2Fimage.png?alt=media&#x26;token=0b0927cf-b234-493b-9a74-bea273cd18de" alt="Screenshot of the Oscar OpenOnDemand Portal showing the Interactive Apps dropdown menu open with the Desktop option circled in red."><figcaption></figcaption></figure>

### 2. Choose the resource option:
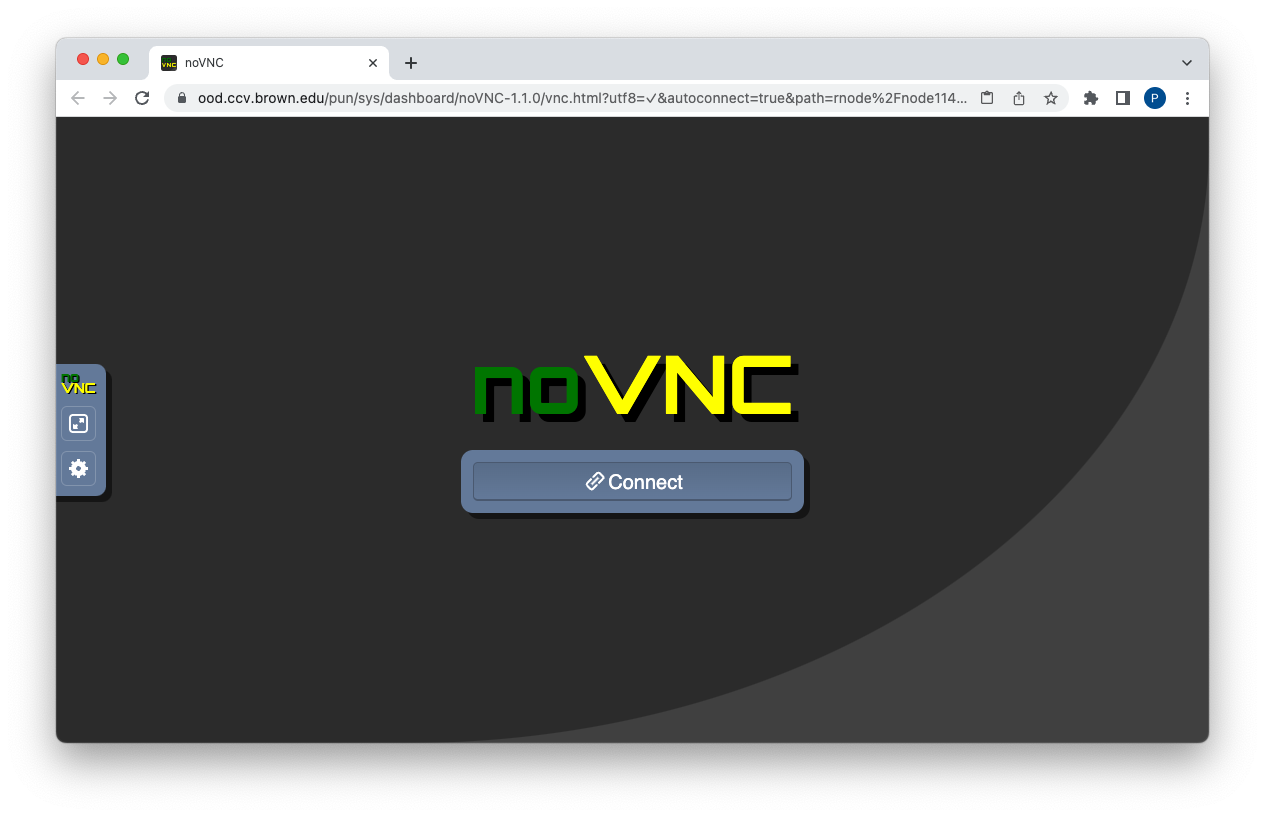
<figure><img src="https://4272811953-files.gitbook.io/~/files/v0/b/gitbook-x-prod.appspot.com/o/spaces%2F-LcWJ6pKCQH6l3rl9IQa%2Fuploads%2F11EWWNQePhh5cSshSx8D%2Fimage.png?alt=media&#x26;token=8028a743-83ef-47ca-8c2d-690ba73cad43" alt="Desktop app resource configuration form showing a dropdown menu with several resource presets for cores, memory, and duration."><figcaption></figcaption></figure>

### 3. Wait and Launch!

<figure><img src="https://4272811953-files.gitbook.io/~/files/v0/b/gitbook-x-prod.appspot.com/o/spaces%2F-LcWJ6pKCQH6l3rl9IQa%2Fuploads%2FMPcujSbf70eYvouSehmb%2Fimage.png?alt=media&#x26;token=8a19f314-426c-40cc-be0a-be4a87d6b997" alt="Desktop session management page showing a running session with a blue Launch Desktop button highlighted by a red circle and arrow."><figcaption></figcaption></figure>

{% hint style="info" %}
You may change the **Image Quality** if your internet connection is bad. Image quality can be changed in the middle of the session.
{% endhint %}

<div align="center"><figure><img src="https://4272811953-files.gitbook.io/~/files/v0/b/gitbook-x-prod.appspot.com/o/spaces%2F-LcWJ6pKCQH6l3rl9IQa%2Fuploads%2FGLd0HTK15PeAb8vb5n54%2Fimage.png?alt=media&#x26;token=cadc52b3-b067-4756-b07e-066934c240f5" alt="Image Quality slider in the Desktop session management interface, highlighted with a red box and arrow."><figcaption></figcaption></figure></div>

## Reconnecting to session

A session may get disconnected if it is not active for a while:

<figure><img src="https://lh3.googleusercontent.com/yPyX09joKK5Ze-uGNjgXiOyN3x0nJMk_dWijkmboM8Gtkocx23LY3-7rBvod6hQ6s3rnqgdsY65kRqhqGuIUl2wrCp2Kjuz0pVs4OcdXB5c0rJNAH4sHNLv7x-AWFANRu_coQh2-pmW78vf9_JEyGOLwXp0WH2Bl8r2kad3kORuU1yemlyUPPC584mfqM_yh=s2048" alt="Browser screen showing a Disconnected message from the noVNC client with a Connect button."><figcaption></figcaption></figure>

If the session **disconnects** as shown above, please **don't** click the "Connect" button on the screen. You may go to **Open OnDemand** page and click “**My Interactive Sessions**” to find the session again:

<figure><img src="https://4272811953-files.gitbook.io/~/files/v0/b/gitbook-x-prod.appspot.com/o/spaces%2F-LcWJ6pKCQH6l3rl9IQa%2Fuploads%2Fh9BQhLJaMHHXJgoKoSfj%2Fimage.png?alt=media&#x26;token=014324a1-83db-480a-815f-71e526de587f" alt="Screenshot of the OpenOnDemand navigation bar with My Interactive Sessions circled in red."><figcaption></figcaption></figure>

{% hint style="warning" %}
Please don’t launch a new session if you have an existing session. You cannot launch two desktop sessions at the same time.
{% endhint %}

{% hint style="info" %}
Sometimes, the “My interactive Sessions” button is shortened to look like:

<img src="https://4272811953-files.gitbook.io/~/files/v0/b/gitbook-x-prod.appspot.com/o/spaces%2F-LcWJ6pKCQH6l3rl9IQa%2Fuploads%2FzjrT8kg6nubFqTzPakiL%2Fimage.png?alt=media&#x26;token=041e0628-0b90-4c66-a729-9dbe07c6c50e" alt="A small blue button with a white icon representing My Interactive Sessions on smaller screens." data-size="line">
{% endhint %}

## Copying and pasting text

{% tabs %}
{% tab title="Google Chrome" %}
If you are using Google Chrome, switch on the "Clipboard" permission and you can directly copy and paste text into the OOD Desktop from any other program.

1. Click the Lock icon to the left of the URL
2. Switch on the "Clipboard" permission

![Google Chrome site permissions dialog showing the Clipboard toggle switched to the on position.](https://4272811953-files.gitbook.io/~/files/v0/b/gitbook-x-prod.appspot.com/o/spaces%2F-LcWJ6pKCQH6l3rl9IQa%2Fuploads%2FgkTXYyH1nZgTj7KcEUKR%2Fpermissions.png?alt=media\&token=229a7cbe-bd2e-4a3b-8be4-01e9c9ca91c8)
{% endtab %}

{% tab title="Other Browsers" %}
Click the side panel button on the extreme left hand side of the screen.

* To copy text into the Desktop session, paste the data into the Clipboard. It will be available to paste inside the Desktop session.
* To copy text from the Desktop session, open the Clipboard. The copied text will be displayed inside it. You can select and copy the text inside the Clipboard and paste it to an external program.

<figure><img src="https://4272811953-files.gitbook.io/~/files/v0/b/gitbook-x-prod.appspot.com/o/spaces%2F-LcWJ6pKCQH6l3rl9IQa%2Fuploads%2F7cwueVISQa8rsq7yAD9E%2Fimage.png?alt=media&#x26;token=b2917ca8-c197-47c1-8759-ec1164119893" alt="The noVNC side menu expanded, showing the Clipboard icon and a text box for copying and pasting text."><figcaption></figcaption></figure>
{% endtab %}
{% endtabs %}

## Desktop (Advanced)

If you need **more** or **different** **resources** than those available from the default Desktop session, you should use the Advanced Desktop app. Resources requested here count against the resources allowed for your Oscar account.

### 1. Select the Desktop (Advanced) app under Interactive Apps.

<figure><img src="https://4272811953-files.gitbook.io/~/files/v0/b/gitbook-x-prod.appspot.com/o/spaces%2F-LcWJ6pKCQH6l3rl9IQa%2Fuploads%2FcaRoJ835nzDLfKXYGM79%2Fadv%20desktop.png?alt=media&#x26;token=6766ff17-f3d6-46e8-9568-a03c2a6d9914" alt="OpenOnDemand navigation bar with &#x27;Interactive Apps&#x27; item expanded and the &#x27;Desktop (Advanced)&#x27; dropdown item highlighted. The &#x27;Interactive Apps&#x27; item is circled and labeled with a 1 and the &#x27;Desktop (Advanced)&#x27; is circled and labeled with a 2."><figcaption></figcaption></figure>

### 2. Choose required resources

Fill out the form with your required resources.

* **Account**: Enter your **condo** account name. If you are not a member of a condo, leave this **blank**
* **Desktop Environment**: Choose **XFCE**. KDE works for CPU jobs, but may not be able to use GPU acceleration correctly.
* **Number of hours**: Choose appropriately. Your Desktop session will end abruptly after this time has lapsed. Requesting a very long session will result in a lower job priority.
* **Partition**: Equivalent to `#SBATCH -p` option. The desktop session will run on this partition.
* **Num Cores:** Equivalent to the `#SBATCH -n` option.
* **Num GPUs**: Equivalent to the `#SBATCH --gres=gpu:` option. This field is **ignored** if the partition does not have any GPU nodes, e.g. batch
* **Memory (GB):** Equivalent to the `#SBATCH --mem=` option.
* **Reservation:** Equivalent to the `#SBATCH --reservation=` option. Leave **blank** if you are not using a reservation.

### 3. Wait and Launch!

Wait and launch this session like the regular Desktop session.

## Modify the Terminal App

Inside the Desktop session , click on Applications in the top left

Applications -> Settings -> Default Applications

<figure><img src="https://4272811953-files.gitbook.io/~/files/v0/b/gitbook-x-prod.appspot.com/o/spaces%2F-LcWJ6pKCQH6l3rl9IQa%2Fuploads%2FKUdWV1S1chAz8XjljHxh%2FScreenshot%202024-01-09%20at%204.20.08%E2%80%AFPM.png?alt=media&#x26;token=1188b41d-d187-4e8f-83e7-971818afcb95" alt="The XFCE Applications menu showing the path through Settings to the Default Applications option."><figcaption></figcaption></figure>

In the new Window, click on the "Utilities" tab and choose "Gnome Terminal" in the drop down menu under "Terminal Emulator"

<figure><img src="https://4272811953-files.gitbook.io/~/files/v0/b/gitbook-x-prod.appspot.com/o/spaces%2F-LcWJ6pKCQH6l3rl9IQa%2Fuploads%2FcnkggPq8Zw9PDAmhQqf4%2FScreenshot%202024-01-09%20at%204.20.30%E2%80%AFPM.png?alt=media&#x26;token=9173b994-b451-44a0-aaa8-ec323df28adb" alt="The Default Applications settings window with the Utilities tab selected and GNOME Terminal chosen as the default Terminal Emulator."><figcaption></figcaption></figure>

Then click on "Applications -> Terminal Emulator" to launch the terminal:

<figure><img src="https://4272811953-files.gitbook.io/~/files/v0/b/gitbook-x-prod.appspot.com/o/spaces%2F-LcWJ6pKCQH6l3rl9IQa%2Fuploads%2FFgtluBBBIYlgitpRvTnY%2Fimage.png?alt=media&#x26;token=91b94a7b-ab8d-4348-8c54-66bc0e408881" alt="The Applications menu in the Desktop session with the Terminal Emulator option circled in red."><figcaption></figcaption></figure>

### If the steps mentioned above do not work:

1. Close the Desktop session
2. Inside a terminal (outside the Desktop session), run this command:

   ```bash
   rm -r ~/.ood_config
   ```
3. Start a new desktop session.

### Change the Terminal icon for launcher panel

Please drag and drop the "Terminal Emulator" icon from the "Applications" menu to the launcher panel at the bottom of the screen, it will be inserted to the launcher panel:

<figure><img src="https://4272811953-files.gitbook.io/~/files/v0/b/gitbook-x-prod.appspot.com/o/spaces%2F-LcWJ6pKCQH6l3rl9IQa%2Fuploads%2FnQcbGVheJedAcd5v2iPa%2Fimage.png?alt=media&#x26;token=b241661f-df4a-40af-aecc-1da0ac6c1973" alt="Screenshot showing how to drag the Terminal Emulator from the Applications menu to the bottom launcher panel."><figcaption></figcaption></figure>

Then click on "Create Launcher":

<figure><img src="https://4272811953-files.gitbook.io/~/files/v0/b/gitbook-x-prod.appspot.com/o/spaces%2F-LcWJ6pKCQH6l3rl9IQa%2Fuploads%2FZdUlzTdsd1pWlzFXM1lR%2Fimage.png?alt=media&#x26;token=578d1dd9-94ba-435d-bc86-3ec3f9408bae" alt="The Create Launcher dialog box with the Create Launcher button circled in red."><figcaption></figcaption></figure>

You may remove the old terminal icon after adding the new icon:

<figure><img src="https://4272811953-files.gitbook.io/~/files/v0/b/gitbook-x-prod.appspot.com/o/spaces%2F-LcWJ6pKCQH6l3rl9IQa%2Fuploads%2F6nTwpCn5tt2S2Y5oDsEV%2Fimage.png?alt=media&#x26;token=80336a33-d3a3-423b-96fd-b538e45a594d" alt="Context menu on a launcher icon in the panel with the Remove option circled in red."><figcaption></figcaption></figure>


---

# Agent Instructions: Querying This Documentation

If you need additional information that is not directly available in this page, you can query the documentation dynamically by asking a question.

Perform an HTTP GET request on the current page URL with the `ask` query parameter:

```
GET https://docs.ccv.brown.edu/oscar/connecting-to-oscar/open-ondemand/desktop-app-vnc.md?ask=<question>
```

The question should be specific, self-contained, and written in natural language.
The response will contain a direct answer to the question and relevant excerpts and sources from the documentation.

Use this mechanism when the answer is not explicitly present in the current page, you need clarification or additional context, or you want to retrieve related documentation sections.
